GitHub Setup Lab
Week 3 · In-Class Lab · 30 pts
Open Your Repo in Codespaces
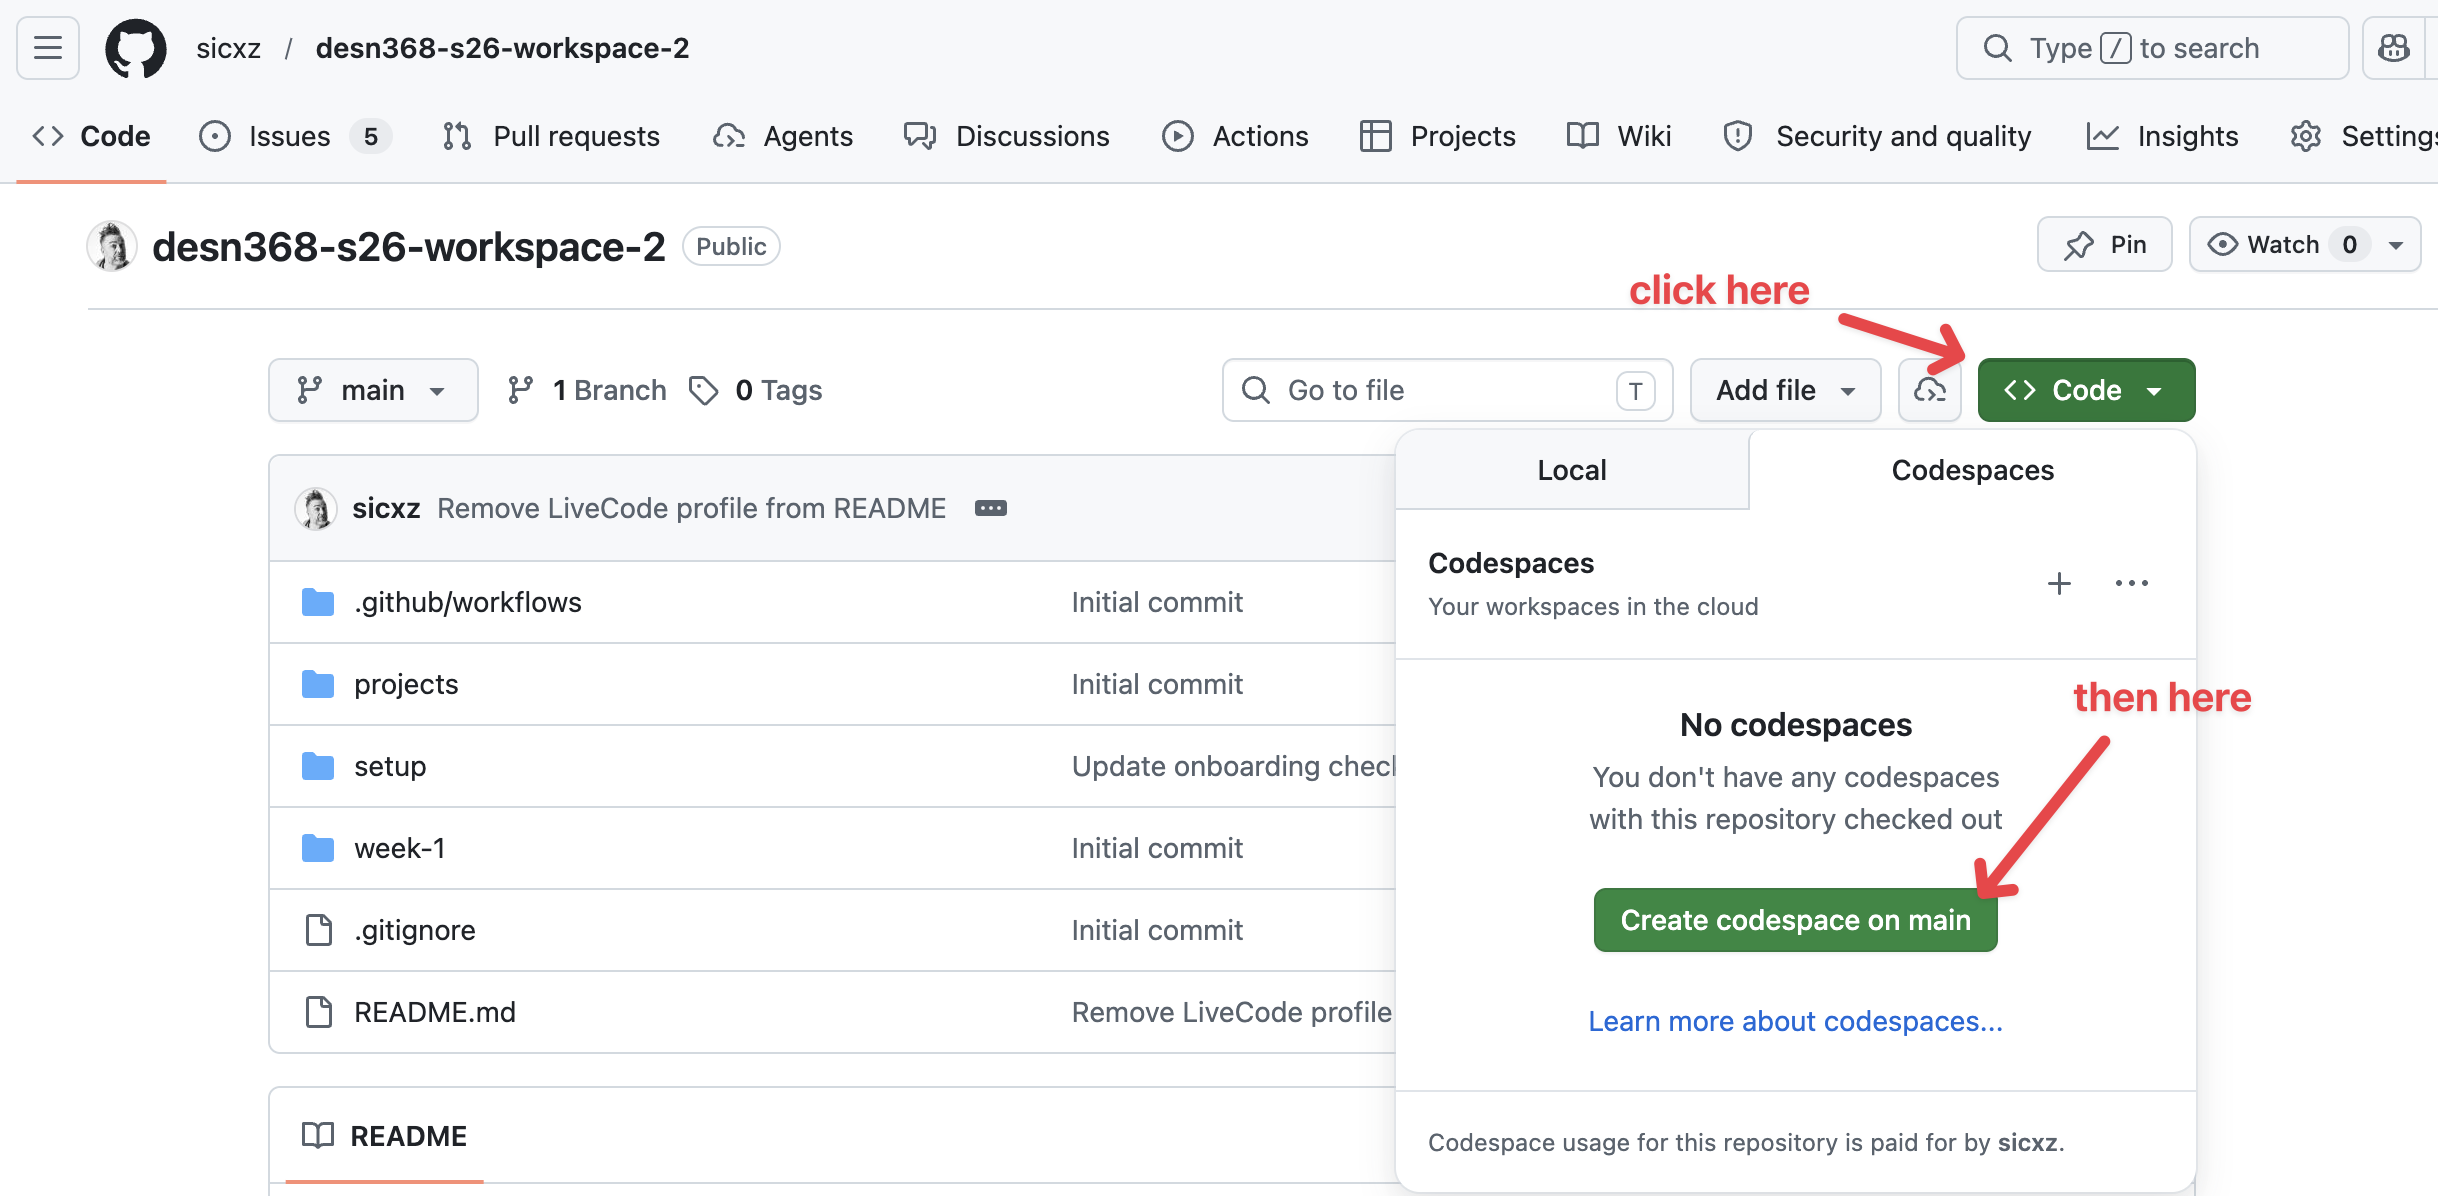
- Go to your GitHub repository in your browser
- Click the green Code button
- Click the Codespaces tab
- Click Create codespace on main (or open your existing codespace)
- Wait for Codespaces to load — you'll see a VS Code editor in your browser
You have VS Code open in your browser via Codespaces, with your repo files visible in the sidebar.
Organize Your Repo
- In the Codespaces file explorer (left sidebar), create three folders:
week-1/week-2/week-3/
- Inside
week-1/, create a subfolder:structure/ - Inside
week-2/, create a subfolder:html-101/
Your folder structure should look like this:
your-repo/
├── week-1/
│   └── structure/
├── week-2/
│   └── html-101/
├── week-3/
├── index.html       (we'll create this later)
├── styles/
│   └── style.css    (we'll create this later)
└── README.mdYour repo has week-1/ (with structure/ inside), week-2/ (with html-101/ inside), and week-3/ folders visible in the sidebar.
Port Your First CodePen Manually
This is the ONE file you'll move by hand. The goal is to understand the process — copy, create, paste, save, link. After this, Copilot handles the rest.
- Open one of your CodePens in a browser tab (pick any — Newspaper, Lost Pet, or Favorite Band)
- In CodePen, click the HTML panel and Select All → Copy the HTML code
- In Codespaces, right-click on the
week-1/folder → New File - Name the file with a descriptive name (NOT
index.html):- Newspaper →
newspaper.html - Lost Pet →
lost-pet.html - Favorite Band →
favorite-band.html
- Newspaper →
- Paste your HTML into the new file
- Check for hidden dependencies: CodePen silently loads fonts and CSS resets for you. Look at your CodePen's Settings (gear icon) → CSS tab and HTML tab:
- If you see a Google Font URL → add a
<link>tag in your file's<head> - If you see a CSS reset or external stylesheet → add a
<link>tag for it too - If nothing is listed, you're good!
- If you see a Google Font URL → add a
Example of adding a Google Font link tag:
<head>
  <link href="https://fonts.googleapis.com/css2?family=Roboto&display=swap" rel="stylesheet">
  <!-- your other head content -->
</head>- Save the file (Ctrl+S / Cmd+S)
You have one CodePen file saved in your week-1/ folder with a descriptive name, and any external fonts/CSS are linked in the <head>.
Your First Commit — Save Your Work to GitHub
Every time you make meaningful progress, you should save it to GitHub. This is called committing. Think of it like saving a checkpoint in a game — you can always come back to it.
- Look at the left sidebar in Codespaces. See the icon that looks like a branch/fork? That's the Source Control panel. Click it (or press Ctrl+Shift+G / Cmd+Shift+G).
- You'll see your new file listed under "Changes". The "U" next to it means "untracked" — GitHub doesn't know about this file yet.
- Click the + icon next to your file to stage it. Staging means "I want to include this file in my next save."
- The file moves from "Changes" to "Staged Changes"
- The letter changes from U to A (added)
- In the Message box at the top, type a short description of what you did:
Add newspaper.html from CodePen - Click the checkmark (✓) button to commit. This saves a snapshot of your work locally.
- Click Sync Changes (or the cloud icon with an arrow) to push your commit to GitHub.
- Open your GitHub repo in a browser tab and verify — your new file should be there!
You can see your file on GitHub.com in your repo. You just made your first commit! You'll do this after every major step from now on.
Let Copilot Handle the Rest
- In Codespaces, open the Copilot Chat panel (click the Copilot icon in the sidebar, or press Ctrl+I / Cmd+I)
- Switch to Ask mode if not already selected
- Give Copilot this prompt:
I need to migrate my remaining CodePen projects into this repo.
Here's what I need:

Week 1 files (in week-1/ folder):
- newspaper.html (newspaper article layout) — SKIP if I already created this
- lost-pet.html (lost pet flyer)
- favorite-band.html (favorite band page)

Week 2 files (in week-2/ folder):
- recipe.html (recipe page)
- html-skeleton.html (HTML skeleton exercise)

Week 2 HTML 101 exercises (in week-2/html-101/ folder):
- building-blocks.html
- styling-inside-out.html
- tagging-content.html
- addressing-elements.html
- annotating-code.html
- nesting-hierarchy.html

For each file, create a basic HTML5 template with a comment
at the top saying "Migrated from CodePen" and a placeholder
where I can paste my CodePen code. Use the project name as
the <title>.- Review Copilot's output — it should create the files with placeholder templates
- For each file Copilot created, open your original CodePen and paste your actual code into the file
- If you skipped a CodePen or don't have one, that's fine — leave the placeholder. You can fill it in later.
Copilot creates the file structure and boilerplate. You still paste your actual code from each CodePen. Think of Copilot as your assistant — it sets up the scaffolding, you bring the content.
Your repo has all your CodePen files organized in the correct week folders. Placeholders are fine for any you haven't finished yet.
Commit Everything
You've done this before in Step 4. Now do it again with all your new files.
- Open the Source Control panel (Ctrl+Shift+G / Cmd+Shift+G)
- Click the + next to "Changes" to stage ALL files at once
- Type your commit message:
Organize repo and migrate remaining CodePens - Click the checkmark (✓) to commit
- Click Sync Changes to push to GitHub
- Verify on GitHub.com — all your week folders and files should be visible
Your GitHub repo shows all your week folders with your migrated CodePen files inside.
Submission
At the end of class, submit:
- A screenshot of your Codespaces workspace showing your progress on your organized repo
- Your GitHub repo URL
These are due at the end of class. The remaining assignments (README cleanup + GitHub Pages) can be finished as homework.